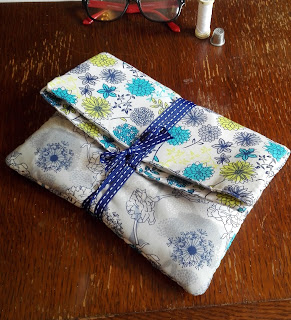
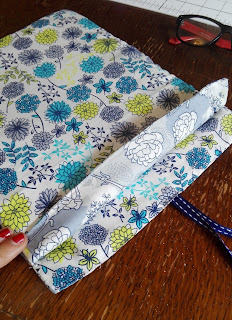
 Anyway, I decided to make this little cover for a notebook or a book. I am always one for taking a book away with me, but it is always a little sad when you carefully put you book in your bag, only to take it out and it's managed to worm its way under everything, and bent the pages and now your water bottle has leaked all over it...
 Admittedly this cover isn't waterproof but it can protect against most things!
The material I used I got in a fat quarter pack, and I used most of two of those fat quarters.
You need four pieces of material for the case, the width approximately 11 inches and 13 inches in length. I found folding a fat quarter in half along its long edge gave me the 11 inches before trimming the top down to 13 inches.
Two of these pieces will be the outside of the case and the other two will be the inside. Using a material in between the two materials can give the case more protection, but is entirely optional. I used some childs craft felt between my layers. It used two A4 size pieces, with a strip from another piece of felt to make up the width. If you are using felt, place the felt in the portrait position, with the fabric also in that position. There will be a gap between the felt and the top of the fabric, this is okay.
So we have four pieces of fabric and two pieces of padding. I started by laying two of the pieces of fabric right side together, then on top of that, laying one piece of padding. Making sure that the edges of all three pieces are lined up, I then made a seem with a straight stitch down one side, along the bottom and along the other long side, making sure to leave the top open. Then turn it the right way around. That is one side of the case.
 I repeated that with the other three pieces of material, and I had two sides done. This is the point when I couldn't decide what fabric I wanted as my lining and what I wanted as the outside. Seeing as I had two halves with one side of each I decided to sew them together so each side was different.
I've got the two sides, and still the top is unsewn. I placed the two pieces right sides together (it doesn't really matter the way I did it, but if you want the inner and outer to be different then do!) and pinned them in place before sewing the two pieces together. Now this step can be done with a sewing machine, but my sides were very thick, and I didn't want to take much away from the space inside the case with seams. So I hand stitched around the outside. Admittedly this did take longer, but I think it was worth it.
Finally with the case mostly done, I just had to finish the top on both sides. I did this by folding the two rough edges inwards, and sewing a straight stitch along the top. Not forgetting to add a ribbon half way along one edge to be able to close the case.
There are a few different ways to secure the case shut, you could add buttons, button holes or loops to hold it shut, but I felt that a ribbon would be able to accommodate different sized books and notebooks that I wanted to put in there.
Also this case isn't just limited to books, it can be used for anything that would fit inside it that you wanted to cover!
I am sorry that I didn't take any step by step photos of how I did it. I can imagine that it could become difficult to follow. I am also aware that there might be an easier way to make this, so feel free to experiment and take away from this any ideas that you might have!!
Happy Making!
