Sunday 15 July 2018

Wedding Wasitcoats

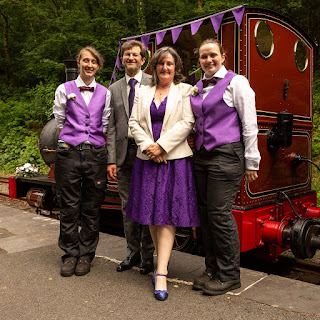
This I think is the first project which I have done which has had a proper deadline. Those of you have been over to my youtube channel and have seen the Blog Round Up video, you will have seen these waistcoats being made and they were for my Mam's wedding.

The theme for the wedding was purple, and we had decided it would be great to have purple waistcoats, but we were sure we couldn't find what we wanted in the shops. So Mam got out an old pattern for a waistcoat that she had used years ago, and we made one waistcoat to see how it went.

The outcome was good, Mam loved it and suddenly I had four more to make. The waistcoats were for Me and Emma (we were firing the wedding train as it was on the Talyllyn Railway) and then another three. One each for my two brothers and then one for Mr M, all who had roles to play on the day.

I did learn a lot, having to make them all in different sizes. This was also the first time I had properly sewn something for someone to wear. I had once sewn myself a basic skirt, but this was a whole new ball game.

Luckily they all came out pretty well, and we had a great day.
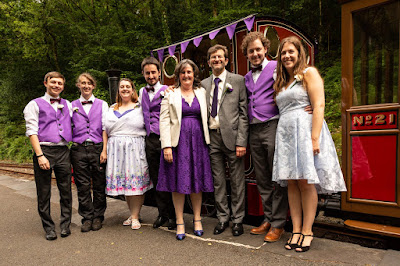
The Happy Couple and Children


The Firemen

Sunday 8 July 2018

Don't let the bed bugs bite!

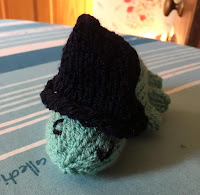
This was a cute little pattern shown to me by my friend Shanni, from a book called Knitting Mochimochi, and it was such a cute pattern I had to have a go! Its called the Bite-Free Bedbug. And it is a little six legged bug, who is very ready to get some kip.

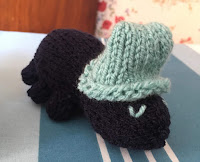
The first one I knitted was this little light aqua coloured one. The yarn I was using was leftover yarn from my Two-Tone Scarf, and his little hat, some leftovers from the Legwarmers I made quite a while ago too. So the bug itself doesn't use much yarn at all.

The Bug is knit entirely in the round, and the suggested needles are four, 4mm DPNs. You knit the main body first and before you finish, you stuff him, before continuing to the end, adding a little more stuffing and then cast off.

I found him really quite simple to knit, and the book itself explained everything, and was well written. The hat was also knit in the round, and added on afterwards, which I thought was a lovely addition. The eyes are sewn on using a contrasting colour at the end as well, just to give it that little sleepy look too.

Whilst the pattern was easy, it was rather fiddly. Especially when it came to the legs and ears, as they were knit separately, then sewn on, but having something to rest it on helped.

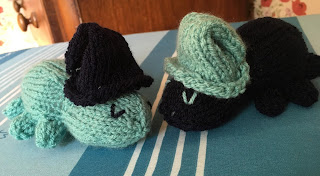
But I enjoyed knitting the first one so much, and still had a lot of leftover yarn I decided to make another in opposite colours. Now interestingly, the second one was ever so slightly smaller than the first one. Now I don't know if that is down to tension, or the differences from when I stuffed them? I'm really not sure, but they do look ever so cute together.

On a slightly soppy note, I did give one of them to Mr M and kept the other for myself. He really liked his, I let him choose which one he wanted, and he kept the lighter colour one.


Saturday 7 July 2018

The Lemmon Juicer Podcast

Those of you who do follow me on facebook or instagram you will have seen the latest post.

I've started a podcast!! It is rather scary, as it really is my first time doing this, and I really hope that you enjoy it. I will be posting on here every time that a podcast goes live, with the show notes and a link to it on Youtube.

So here is the first episode - Looming Landrovers:

Shownotes:
Finished Objects:
Rose Window Hat: https://ravelry.com/patterns/library/rose-window-2
Morpheus Baby Jumper: https://ravelry.com/patterns/library/morpheus
Leftovers Socks: More about them can be found on the blog and ravelry.

WIPs:
Necker Socks: https://ravelry.com/patterns/library/necker
Mara Shawl: https://ravelry.com/patterns/library/mara-9
Badger: https://www.ravelry.com/patterns/library/little-badger

The podcast is in two halves, the first half is your typical knitting podcast, talking about the things I've been making and things I shall be making, and the second half is called In the Shed, and I'll leave you to watch it to find out what that is all about! 

I really hope you enjoy this first episode, and if you want to, please give it a like or a comment, and if you really feel like you want to, subscribe to the channel! I do intend to make another episode, and will probably keep updating on a twice monthly basis, but we will see how it goes! 

Please give it a watch and give feedback if you want to!


Sunday 1 July 2018

Arm Knitted Snood

This knit was quite a bit of fun. I had been given a lovely lovely snood, which was arm knitted for me by a lovely friend and for a long time I had wanted to try it myself. So I did.

This time I used leftover yarn from a 200g ball that I got when I made my Walrus Hat. It is a chunky, 100% acrylic yarn, that is a variegated brown colour.

I thought that the knit would be quite thin, so it would be best to double up the yarn, which I did by pulling from the inside and the outside of the ball. It did prove quite a challenge actually finding the inside of the ball, but we managed...

The snood I really did make up as I went along and I applied the normal knitting technique to what I was doing. Arm through the loop, pick up the yarn, pull it through.

You cannot however, turn your arms. So the effect, especially if you just knit, is not garter stitch, as would be on a normal piece, but stocking stitch. I knew this would be the effect, and I liked it to be that way. I could have tried purling with my arms, but that might have been a bit awkward. I didn't actually try it, so it might not be - We'll find out next time.

I arm knitted until I felt the work was a decent length, before casting off and cutting a very long tail. As the work is so large I also sewed the two ends together using my hands which worked quite well.

All in all the piece took me about 20 minutes to make. It is a very very speedy and easy knit. The fabric it produced was thinner then I thought but it would make a nice light snood. Next time I might try a much thicker yarn. Perhaps double up on super chunky yarn, or try out these new specially made arm knitting yarns.

I am pleased with what I have made, and may well make another one in the future, given that I still have A LOT of this yarn left. I may make the snood a little bit longer too. Or maybe I'll make something completely different to a snood! But that is to decide another day.