Sunday 29 April 2018

Fat Quarter Project Bag

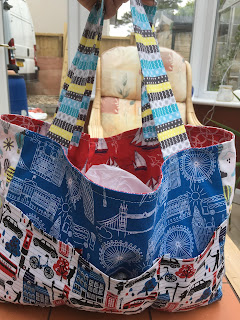
I've seen a few bags designed for keeping knitting and various other projects in, and they seem nice and useful. So I decided that I would try and make one for myself. I already had a couple of fat quarter packs that I wanted to use for something nice, and this seemed like a good thing to use them for.

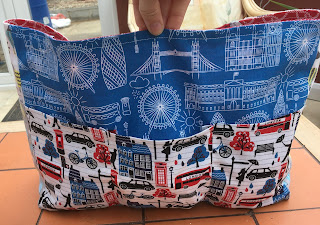
The fat quarter packs were mostly travel related, one pack being London themed and the other one being nautical themed, there was another one with some hot air balloons on it, which I used as well. I think overall I used 9 fat quarters, which is less than two standard packs, but I did pick and choose what I wanted to go on the bag.

New Dimentions
I had an idea of a bag in my mind, and I had sneaked some measurements of a bag that I had seen in a shop, so I had to then try to make a pattern. In my mind the first logical step was to make a scale drawing of the bag I wanted, just the generic square-ish shape. I'm glad I did that, because once I had drawn it, I found that I didn't like the proportions of the bag, it was too upright for what I had in mind. So I plucked some new sizes out of the air using a tape measure. When I then drew those sizes up, they looked so much better, so I went with those.

I sat and worked out what pockets I wanted and how to piece it all together, which, of course meant more technical drawings! ;)

Once the drawings were all done I drew out the panels real size on some old news paper, cut them out and used them as the pattern pieces, which were then folded up, put in an envelope and saved for next time.

The bag has a lining and I had to work out how to sew that together with the outside, in a way that didn't leave seams poking out on the inside, and I managed to suss it out. It did involve sewing a top stitch around the top of the bag to sew up the small hole that I left for turning it the right way out, but I think it looks good.

The pockets took a little thinking about, but there wasn't going to be a lining for the pocket, so it was easier than the main bag. The pockets were sewn into the main seams of the bag, and had a small turned over and top stitched edge along the top.

There are three pockets along the front, but none on the back. I wanted a difference to the front and back of my bag, but it would be easy to add more if you wanted to.

One thing I did do, which I wish I had done differently, is to make the front three pockets out of one piece of fabric, instead of trying to make it out of three... It ended badly, and they are a little wonky, but don't look too close...

The two sides are exactly the same, they are a panel with a pocket in them. The side pockets were easier to do, and involved sewing a hem along the top of the pocket and sewing them into the main bag seams. They worked out well.

There is a separate panel for the bottom piece, which gives the bag a fair amount of width, and I made it out of the same material as the handles. Which were folded over and sewn as a tube, and the ends folded inwards before I attached them to the bag.

When sewing the handles on I took a long time carefully sewing a neat square. It can be seen from both sides so I did worry about it, and whilst I used my sewing machine, I only hand cranked it, and went very slowly.

All in all I'm quite pleased with my bag, and seeing as it is one thing that I really made from the first ideas to the actual real thing, I am a little proud. One thing that I think would make it better is to add some kind of interfacing. The bag is a little floppy, its strong enough to hold all my projects (and carted a few waistcoats in making up to Tywyn to do some of that while I was there), but the interfacing would add a little bit of rigidity to the bag.
I am happy to share the pattern I have made with other people. So if you are interested, do send me a message, and I can send you some drawings of the pattern pieces you need and write up some instructions. I have also recently got a facebook page, linked to the instagram page, which you can contact me on, and see what it going on more frequently then a finished project once a week. You can find the facebook page under the name Lemmon Juicer, and the handle on instagram is @lemmonjuicer - go have a look and feel free to like and comment on there.

Thursday 19 April 2018

Mam's Socks

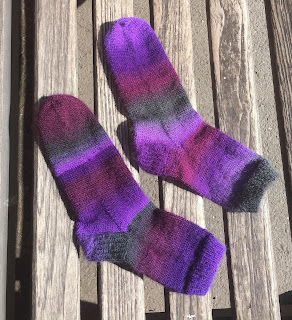
In the wake of all the new sock making, my Mam asked if she could have a pair of socks made. (It was more a "you haven't made me anything in aggeeessssss" kind of remark.) But I really enjoy knitting socks, so I was very happy oblige.

These socks were the second ever that I had made on a circular needle, using the magic loop method. The first sock I made on a circular needle was my scrappy sock, I made it mostly to see how a 60 stitch sock would look and feel like on a 2.5 mm circular needle. The scrappy sock was only an ankle sock, but it fitted well, and seeing as Mam has the same size feet as me I thought it would be fine.

I used my trusty sock pattern I found on love knitting, which I wrote about here. I have to admit the pattern isn't great for knitting on a circular needle, it gets a little tight but it is doable. I am going to look at doing heels differently, because there are many different ways of making heels, and I have an urge to try and learn every one! Maybe just make every one once...

The socks did take me a little while, they had been on my needles for ages and I made quite a few other things before they were done. The top part of the sock I made 12 cm long, which is a little bit shorter than my other socks, but Mam is a little bit shorter, so her socks were too.

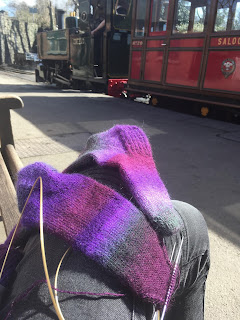
The socks were finally finished in Tywyn. The toes were kitchener stitched up whilst watching the 11:40 departure from Wharf Station on the Talyllyn Railway. Mam at the time was volunteering in the booking office, so they were made and delivered to her through the booking office window!

I did make the socks one at a time, which meant there was a small amount of second sock syndrome. One of the reasons for learning the magic loop method of making socks, is to learn how to make socks two at a time, but that might be for next time.

Mam was very very happy to get her socks, she'd been waiting a little while... oops... but she was happy, and I hope they fit her well. I did try them on, and the cuff was a little tight. So I'm going to try knitting with 64 stitches for me next time.

Sunday 15 April 2018

Cabled Mitts

I was looking for a challenge recently, 
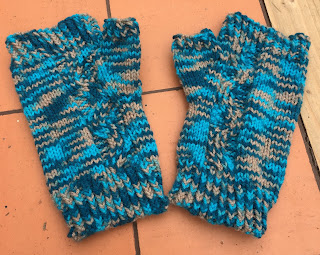
and I decided that I wanted to try something new. I came across this lovely cabled mitten pattern on Love Knitting called Nalu Mitts by Leila Raabe. 

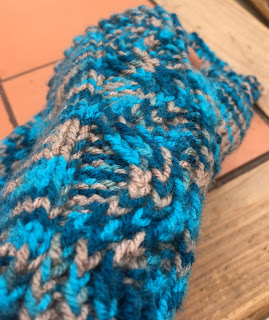
They are a simple pattern for fingerless mittens, with a nice cabled section along the back of the hand. 

I decided to use some yarn out of my stash. It was a blue-y variegated yarn, of a DK weight. DK is the yarn weight that is used in the pattern, although it uses a lovely pale grey colour which really suits it, as well as a set of 3.25mm double pointed needles.

Doing the cable along the back of the mitten was easier then I thought it would be. I am hoping that with a little more practice doing cables I'll begin to understand how they work and be able to use them in my own knitting.

The mittens knitted up really quickly, and despite all the mistakes, including knitting the wrong size thumb (oops!) they are pretty snug, and they look fine. 

Once I had blocked my mittens they then went as a present to my friend Emma, who was admiring them when I was knitting them. They knitted up quite quickly, and were fun to knit too. 

So they were a joy to knit, and seem to also be enjoyed by their new owner. 

Sunday 8 April 2018

Llyn Fach

For a long time I have had a 009 gauge model railway. It is small enough to fit inside a cabinet bookcase, and I used to spend time working on it with my Dad. The past few years the railway has sat inside the bookcase, looking half finished and a little bit sorry for itself.

The railway has a little engine, its a generic saddle tank, and is named Sam, (after Peter Sam in the Rev. Awdry books), Sam also has a few coaches and a couple of trucks, that are shunted here and there around the few sidings.

Loading Gauge Issues
 A couple of years ago, I'd got the layout out and identified where some track needed replacing. Namely around the left side corner, where there was a slight track gauging issue... Some of the little plastic clips which hold in the rail had snapped and the engine would often derail there. I had bought a new length of track to fit there, but that too had been sitting in a box in the corner of the room waiting to be fitted. So I finally decided that I was actually going to do it. And I did.

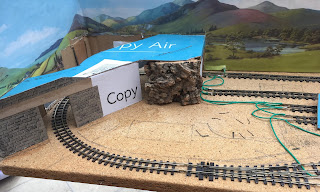
I got out the layout and set up the controller to see if I could reassess the problem. What I found, instead of having track slightly wider than It should have been, was that actually we had a slight loading gauge issue around the road bridge. In my experience vehicles hitting bridges is never good. So I was faced with two options: move the bridge, OR move the track. Seeing as the bridge scenery was partially done, and I was going to replace the track anyway, I started going about replacing track.

The track around the bridge was also interesting. There is a station just before the bridge, loosely modeled on Wharf Station at the Talyllyn Railway, and so there is a platform and just before a loop. At some point there has been some bodging of track work when the loop was put in, and we were left with a rather untidy few sections of track leading out of the loop and under the bridge. The first of which seemed to be causing problems before.
Untidy Track

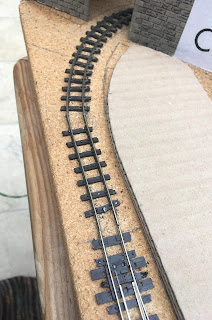
My plan,with the length of track I had, was to replace the entire curve up to the loop point, including the little messy piece. This is what I set about doing, pulling the track pins out, and saving the serviceable ones, and just chucking the old bent ones that weren't of any use. There was only one problem I came across, and that was that most of the corner is covered by the road across the top of the bridge...

Ultimately the only thing I could do was to take a knife to the cardboard bridge to get it out of the way. I had devised a way to cut up the bridge so that there was minimal damage.

I cut the bridge along the rear road boundary and completely lifted the back piece out, which gave just enough access to get in and remove the track, as well as lay the new piece.

Taking the two old pieces of track out was an interesting experience, as the track practically fell apart as soon as the track pins were out and it was slid out of the fishplates. I was rather glad I was replacing it.

The bridge coming off
Once the track was in and pinned down, and the bridge loading gauge issue was sorted, I slowly ran the engine around the curve to see how it ran. Unfortunately it did brush up against the wall at part of the curve, but that was solved by cutting out a section of the cardboard wall. The hole cut out is below the line of the top of the bridge, and will also allow some extra access to the curve once the bridge goes back on.

I was pleased with the curve once it had been relayed. The loading gauge problems were solved, and the curve looks a lot better, hopefully the engine will also run nicely too!

Done!

Sunday 1 April 2018

Poley's Makeover

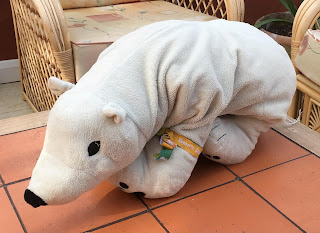
Poley is an old polar bear teddy, that I have had for a very long time. It is safe to say that he has been hugged a lot, and it shows.

He was a very grubby, very floppy bear. Being an engineer, and having rather messy hobbies, having a white teddy bear was rather much a risk. When I was younger he was forcibly taken off me and put through the washing machine...

I realised a little while ago, that he really was looking sad, and quite sorry for himself so I decided to do something about it.

First things first, he was filthy, more a subtle grey colour then white... So he made a trip into the washing machine, he did look a little sad sat there waiting for the fairground ride.

After coming out he looked so much better, and a lot more white then I've ever remembered him to me.

The next challenge was to make him less of a rag doll and more of a bear. There was a fine line to be drawn here. For a very very long time, Poley has been a floppy bear, and in some ways, if he wasn't floppy, he wouldn't be Poley.

I carefully unpicked a seam along his belly, and then restuffed him through there. I was very careful not to over-stuff him. I wanted him to look a healthy size, but still be floppy bear.

Once he was done I was very pleased with the days work. He also was a lot more huggable. Which is required for a teddy bear.

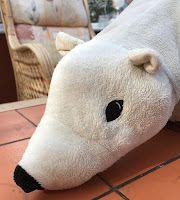
One thing I did find out, which I had totally forgotten, is that Poley actually has a forehead! who knew!