Monday, 12 February 2018

Nut Bracelet

This make has been an idea for a long time, but now it is finally a reality. I got the idea from a picture I saw on Pinterest, but unfortunately I never actually saved the photo... So I freestyled my own.

To make the bracelet I used M4 nuts (from a local hardware shop), 7mm jump rings and a clasp, (mine were from Hobbycraft).

The nuts, and the jump rings both came in a pack of 100, so I had a fair amount to play with, and I do have small wrists. I worked out that the circumference of my wrist is about 170mm. I had tried to work out how many nuts I would need, but it was difficult to take into account the jump rings, and the clasp. So I just started making a chain of nuts and jump rings and trying it on for size. I found out I needed 19 nuts.

The nuts are connected to the nut next to them using two jump rings, so on the main bracelet I had 19 nuts, held together with 36 jump rings, in pairs. The clasp I had can only take one jump ring at the bottom where it needs to be attached. So in one of the end nuts there is one jump ring attaching the clasp.
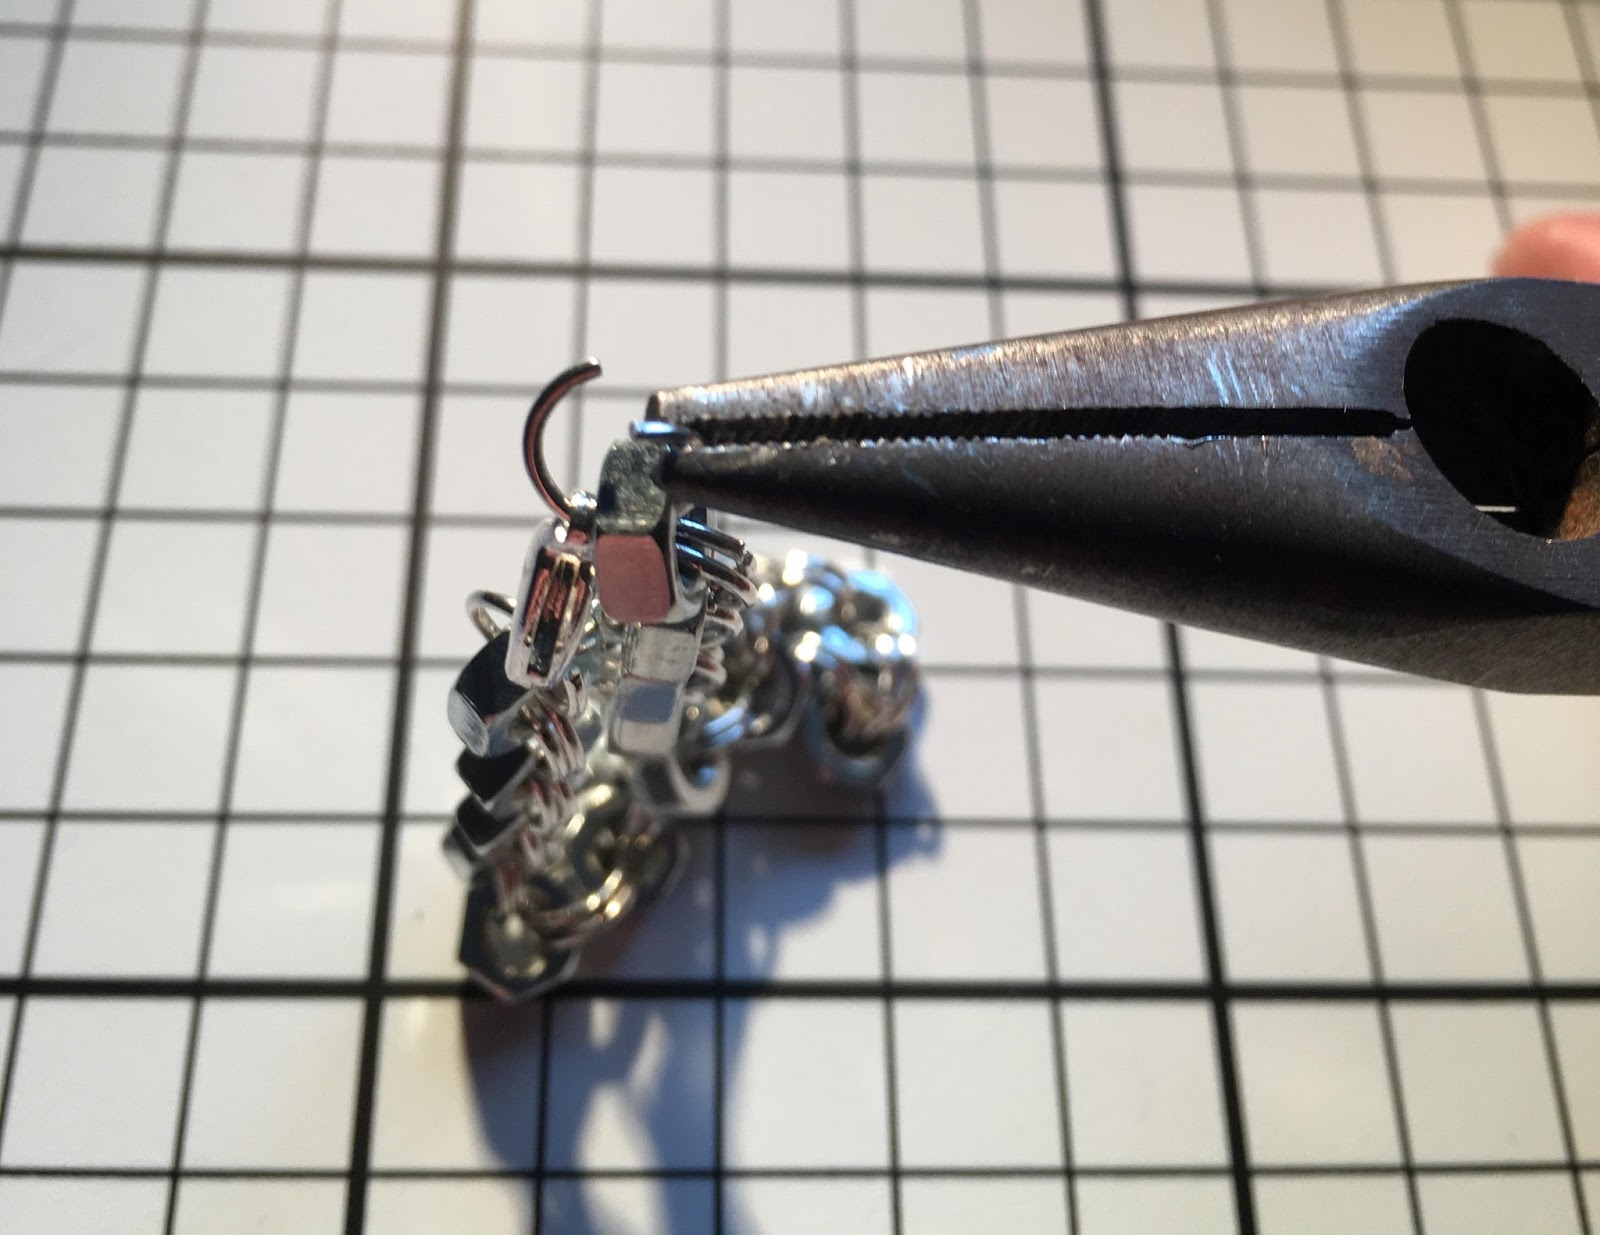
I did try out of curiosity, if the clasp would close over one of the nuts, but the clasp I got is too small, the nut will fit in, but the clasp will not close, so I added another jump ring to the other side. So in total there are 38 jump rings on the bracelet.

Jump rings themselves are really easy to use, especially if you have a pair of thin nose pliers, some people recommend pliers with round noses, but anything that can help you grip the jump ring will be fine. Grip the jump ring with the pliers, and either using your hand or another set of pliers, twist the ring so that the two ends have seperated. This will allow you to thread things onto the ring, before twisting it back the other way to shut it. Occasionally you will find that there is a small gap between the two ends of the ring once it is closed. To avoid this when I'm twisting the ring back, I apply a force inwards as well, this tends to push the two ends closer together, and does get rid of the gap.

The bracelet is very easy to make, and is pretty much just threading nuts onto jump rings. The bracelet can very easily be made to a size that fits any wrist, or ankle, just by adding and taking away nuts.


Monday, 5 February 2018

Snowball Beanie


The other day I came across a lovely looking hat on pinterest, and as the stash was becoming slightly out of control I thought I would try it! The pattern was a free pattern on Left In Knots, and is also available to buy on Ravelry.


I managed to make the hat with two 50g balls of what I think was double knit! And the adult size hat looks like a small size, but does stretch out nicely.

It's made by crocheting the band of the hat in rows, before working the top in the round, which grafts onto the band.

The hat took me a couple of days to make and did grow very quickly. The pattern online gives the instructions on how to make the hat and does give a few ideas for the bobble on the top.

For my bobble, I made a pompom, as in the photos on the pattern, but the pattern doesn't give instructions for how to make one, but it was something I have done before.

To make pompoms you need two rings, you can buy pompom makers, which come in four parts and are very easy and quick to use, but I mocked myself up a pompom maker from on old cardboard box, that I think once held hammers.

The size of the rings made, will give you the size of the pompom, the bigger the rings, the bigger the pompom. The wool is wrapped around the two rings, keep on winding the wool around so there is a good thick layer.

Then cut the wool around the edge of the cardboard rings. This will allow you to wind a bit of wool between the two cardboard rings, tie it in a tight knot, and you should have what looks like a pompom, with two cardboard rings around the midde!

The pompom can be trimmed into shape (whatever shape you fancy, I went traditional sphere!), and then it is ready to attach to the hat. There isn't really a special way to attach the pompom, if you leave a long enough tail from tying the pompom it can be used to sew it onto the top of the hat.

The hat made a happy home with Mam, she loves purple, and she is always happy to have things made for her!

Monday, 29 January 2018

My First Quilt

Font
A little while ago, I thought I would try my hand at quilting. As usual things like college got in the way, but I made the front of a quilt. I made the front out of a fat quarter pack that I got from Hobbycraft, and I created this pattern. Being the engineer I am I did a technical drawing to see how the pattern would look, and to use as a guide as I was making it.

I finished the front fairly quickly, and it got folded up and put in a draw for quite a while. Part of the reason was that I didn't have anything for the back - to be honest I hadn't actually thought that far ahead!

BUT! I did find a little while later another fat quarter pack (they were packs of six), that I figured would go with the front. Then I struggled with what to do on the back. Did I want another busy pattern like the front? Did I want it to be obvious that it was the back? Does the back need to be boring? I really didn't know. So that fabric sat in the draw with the front of the quilt waiting to be put together!

Back
I finally got around to making the back, I decided that as long as I liked the design on the front and on the back, who cared which side was which! The pattern was much more simple, but I think it looks nice, and was nice to sew together.

The next thing to figure out is how to quilt it all together. First of all I need to get the wadding to go in the middle. Which I'm still yet to do, and after that is done I can put a border around it and I will have finally finished it.

Then after this one, I may make another one!

Sunday, 21 January 2018

Get Ahead, Get a Hat

This is the first of a couple of hats that I made over the Christmas break. I was given a kit for a hat and arm warmers quite a while ago by my friend Nicky (who I made a blanket for which you can see here) and I finally got around to making them.

The kit came with its own pattern, and both parts are knitted flat then seamed together, and I started the hat as a travelling project to take out to Germany. The journey started fine, but by the time I had made it out the airport in Germany, I had snapped both of the old (and brittle) needles that I had, and one was in three pieces... It was a small disaster, but I soon found out that German supermarkets sell knitting needles (hurray!) and the disaster was a very short lived one and I got back to keeping my hands happy.

By the time we made it back to England the hat was done and I had finished the first arm warmer on the plane home, the second one was finished shortly afterwards and the set made its way to my best friend Emma, where they are currently being loved and warn. (a lot more than they would have been if they stayed with their maker!) - not that I don't like them, I do, I just have a lot of hats...

The pattern itself alternates rows of stocking stitch, from one right side to the other in rows of four. Which creates the ripple effect, and I was a little dubious of it to start with, but did slowly fall in love with it as I knitted along.

Safe to say this was the first hat that I knitted, and I don't think it was perfect (far from it) and some of the decreasing is slightly dodgy, but it shapes well, and suits Emma's head - yay!


Sunday, 14 January 2018

Mr M's Christmas Socks

After the success of my first pair of socks, the next thing was to try and make a pair for Mr M. I used the same pattern as before from Love Knitting, and used the bigger size, which worked well for his bigger feet! The only problem was measuring his foot to get the right size without giving it away... But I managed that, he didn't seem like he knew he was getting a pair of socks for christmas when he unwrapped them, so either I was successful, or he just didn't want to hurt my feelings... I'll just pretend it was the first one...

The wool I used for this lovely pair was a Drops Delight wool, in their Red/Orange/Grey print from Wool Warehouse. (A lovely place to get wool and some attic 24 patterns) This pair knitted up a lot quicker then my first pair (naturally), and I did continue to use five double pointed needles (DPNs). For my next pair however I am going to be trying a circular needle, and may just learn how to knit two socks at once! But that is a little way into the future and just an ever-so-slightly scary idea. But I'll get there.

Now Mr M is proudly pottering about in his new socks. You never know, next year he might get a jumper (or another scarf...).


Sunday, 7 January 2018

Two-Tone Scarf

It's been a while since I last posted, with going away for the christmas holidays and the getting back to normal life afterwards. But! I did manage to get a few projects done!

This twin tone scarf has been something I have wanted to make for a little while. The scarf is knitted on a circular needle, and involved a tubular cast on, and an odd little way of knitting it, to get the effect of one colour one side and a different colour the other.

The pattern was another one that I had in my "Bumper Book Of Knitting" the book gave instructions on how to tubular cast on, as well as cast off. But I will admit I found the book instructions for casting off very hard. I did find a handy tutorial on Purl Soho, which explained that really it is Kitchener stitch, which I have used for sock toes, so all was well.

I did mess up the cast off a little bit, and will have to finally try blocking to get the scarf looking its best, but overall I'm pleased with it. It did keep me nice and warm on our family holiday to Germany!

Tuesday, 21 November 2017

A Heart to Mend Friendships

This was a little pattern that I found whilst scrolling through Pinterest. It was a crochet pattern, but one of the picture ones, and I thought I would give it a go with a little wool from the stash.

The pin that I read the pattern from can be found here, I also believe that the written pattern can be found on Ravelry (a link to that website is in the sidebar) but I'm not sure where on Ravelry.

I did really enjoy making this little heart. This one is now on it's way to a new home, but I might make a few more and find a cute project to put them into.